Wreath-making used to really intimidate me. A couple years ago, the hospital I was working at was holding a fundraiser and each department was asked to supply a holiday wreath for it. Because I was the only
girl crafty person in the supply chain and plant ops department, the task fell to me–which I was actually super excited about. Finally an excuse to learn how to make a wreath! I made a Halloween wreath that was so darn cute I couldn’t part with it, so I made a second wreath to give away for the fundraiser. 

I’d almost be okay displaying that Halloween wreath all year round, but Jared? Not so much. So I’ve been needing a fall wreath to hang until October. This DIY project is actually really simple, and I love how cheap it was to make! Because…
I’m a sucker for a sale. Like it might be bordering on illness…but I think it’s a large border, so I’m probably fine. Jared’s been married to me for a year so he knows the drill:
THE CONVERSATIONS BETWEEN A CRAFT-SUPPLY-HOARDING WIFE AND HER HUSBAND
“Ooh, Jared, this scrap of faux fur in the remnant bin? I might need it, I have no idea what for, but just in case. It’s only $6.”
“Okay, Jared…I have to tell you something. But before I tell you that I spent $200 on things I don’t really need, just know that everything was at least 50% off.”
“Jared, Michael’s still has some $4 grab bags of random clearance items that I know I might need and I forgot to buy four or five the other night when I was there…”
(This last one is a conversation yet to be had. And yes, it wasn’t until after I’d checked out that I spotted the grab bags at the door and I’m still kicking myself for not going back. No, it’s not an illness, thank you for your concern anyway.)
Well…
…sometimes my scouring of the clearance bin eventually leads to something amazing and then I feel justified.

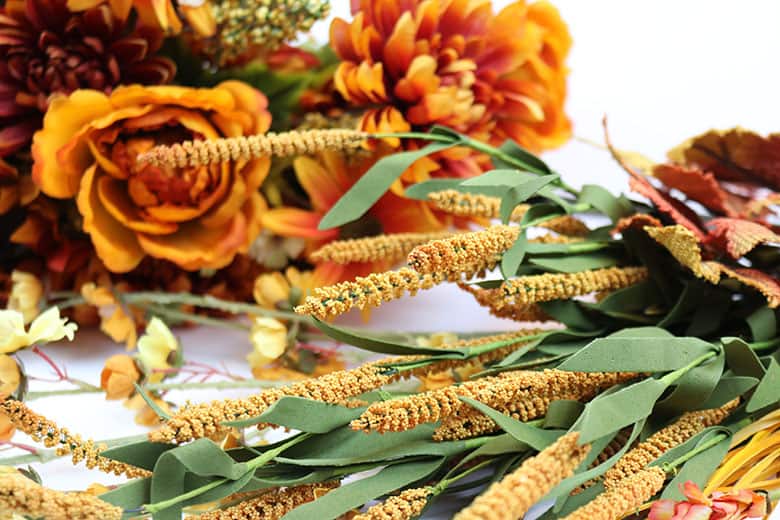
Like when I pulled out my fall decorations a few weeks ago and remembered I had stocked up on fall floral picks last year when they were 90% off at Hobby Lobby after Thanksgiving. “You brilliant girl,” I exclaimed, patting myself on the back.
I don’t remember how much I spent total, but each pick had to have been less than a few dollars–and some, just pennies. Plus, I have enough picks leftover for probably five more of these wreaths, or any number of other fall craft projects!
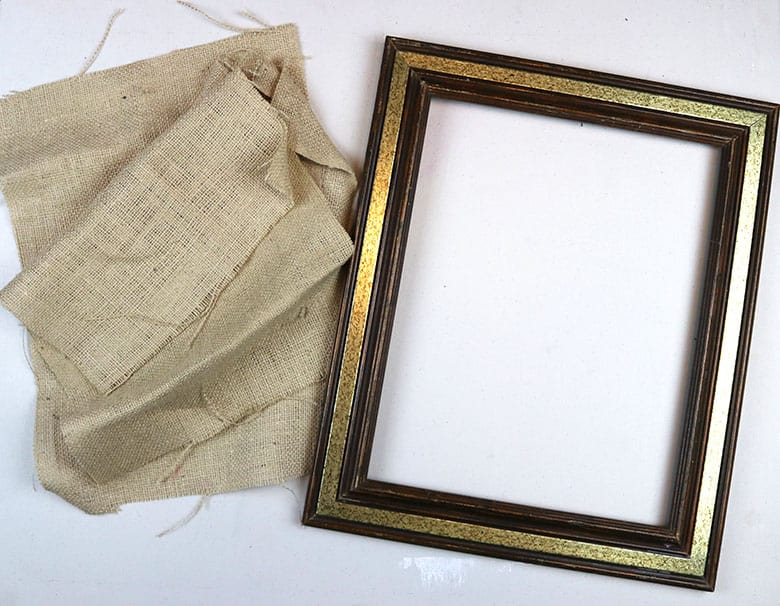
To make this even thriftier, I used a picture frame from the DI (Deseret Industries) that cost $1, and I already had the burlap and ribbon on hand from previous craft projects. And obviously, paint and hot glue are staples in my craft room.
This post contains affiliate links. For more information, see my disclosures here.
SOME NOTES ABOUT HOT GLUE
Hot glue is hot. (Duh.) I’m no novice when it comes to hot glue, but I managed to burn myself multiple times and acquire blisters on both thumbs (they hurt for an hour and went away in a day). If the videos were slower, you’d see me jump back suddenly a few times–that was so I could peel the burning glue off my fingers and yell some choice words in my head (“son of a nutcracker!”).
So be careful! Burlap has holes in it, so it’s really easy for the hot glue to seep through and burn your fingers. I started using a pen to press the burlap down into the hot glue, which was a much smarter idea–the pen doesn’t yell fake cuss words, and you can pull the glue off once it’s dried.
Update: I just discovered that they make hot glue finger caps! These are now on my crafting wish list!
OKAY, BUT THE THING I REALLY WANT YOU TO KNOW ABOUT THIS WREATH
It’s super easy! A bit of cutting, a bit of arranging, some hot glue, and you’re golden! You got this!
WHAT YOU NEED TO MAKE A SIMPLE FALL WREATH FROM A PICTURE FRAME

- thrifted picture frame–mine is about 14″ x 17″ (the wider the frame edges, the better!)
- burlap (or wide burlap ribbon)
- fall floral picks
- wood sign (you could also use a chalkboard sign, monogram, or wooden word)
- paint for sign (or Sharpie paint pen)
- brad (or nail or clothespin) to hang sign
- ribbon
- hot glue gun (and extra refills–I went through about 2 large sticks)
- wire cutters
- gloves or a pen/marker: something to protect your hands from hot glue burns (ummm…where have THESE been all my life??!)
HOW TO MAKE A SIMPLE FALL WREATH FROM A THRIFTED PICTURE FRAME
COVER THE FRAME WITH BURLAP
- Cut four rectangular strips of burlap to cover your picture frame, one for each side. They should be wide enough to wrap around a side and be glued to the back of the frame so no cut edges show. The length will be the length of the side you are covering.
- Cover the first two sides of the frame, hot-gluing the burlap to the frame. (If you are using burlap ribbon, you’ll simply wrap the frame at an angle, weaving in and out, and overlapping as you go. You’ll only need to glue at the start, maybe a few times in the middle, and at the end.) I started with the long sides first, since my burlap scraps were slightly shorter than the frame and I knew I wanted the short sides to be able to cover those exposed corners afterwards. I glued the burlap to the back, to the front, and then to the back again–just wrap and glue as you go. This is where I used a pen to press the burlap into the glue. In the video, you can see that I let the burlap bunch up in the corners, and that’s okay.
- For the next two sides, you’re going to want to make cuts to help the burlap lay flat–it’s kind of like wrapping a present, but the video does a much better job at showing you what I mean. Once you’re to the corners, you can either save a little burlap and fold it under for a mitered-corner, or just cut it at a diagonal–just cutting it was easier. To finish gluing down the corners, you kind of work it like a present again. In the video, you can see I just play with it for a minute until I figure out a way to get it to lay flat and hide the messy edges–I didn’t use any specific method.

Not all of the corners will turn out pretty, and that’s okay. You’re not going to notice from the front.


This articel adopted from this site


0 Komentar